When you change an accountant or just opened a new company and subscribed to QuickBooks Online you may need to add an accountant to your Quickbooks Online. That will provide your accountant with access to all your invoices, expenses and other information, and the best way to provide such access is to use the “Accounting Firms” feature provided by Intuit.
Scroll to the end of this post to watch the video tutorial
How to add an accountant to your QuickBooks account
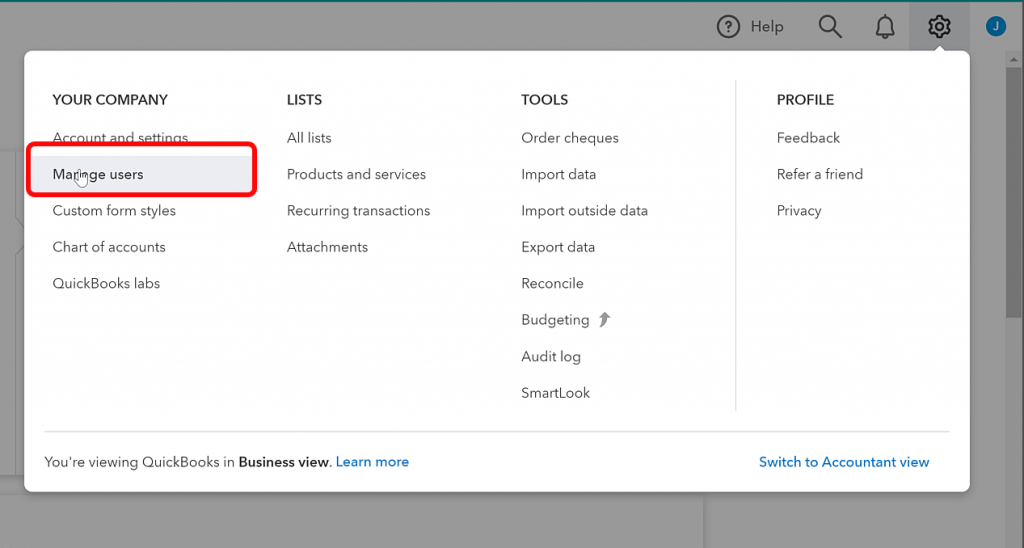
Once you logged in to your Quickbooks account and opened the home page, you will see a Gear icon in the right top corner. That icon contains most of the customization settings for your Quickbooks online account.
Click the gear icon, which will open a new menu. Locate the “Manage users” menu item under the “Your company” section.
Once you click “Manage users,” a new page will be opened. On this page, you can add other users to your QuickBooks account. In the past, you have to add your accountant on this page, but recently Intuit moved that feature to the new “Accounting firms” tab. Now click on the “Accounting firms.”
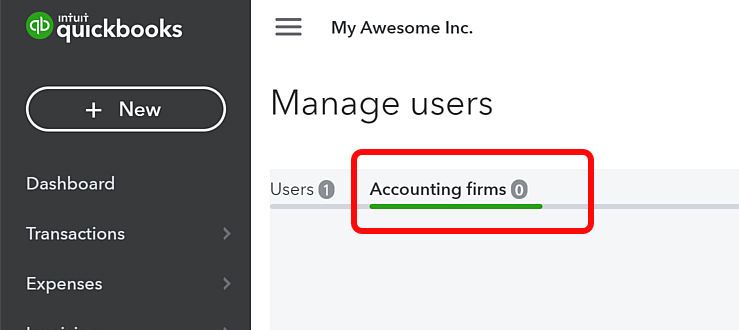
If you just opened a new account and never had an accountant before, the page will be empty, and you will see a message of how you can invite your accountant by typing her email address.
Make sure you know your accountant’s email address, which she uses for the Quickbooks access, because that address may be different from the email you usually use for communication with your accountant.
In this demo, we will invite Anna Grigoryan, who is the Chief accountant in Taxory, by typing her email address.
Now, on the Accounting firms tab, you will see the invitation you send, and you have an option to resend the invitation or cancel it by pressing the desired action.
At the same time, when you press the invite button, Quickbooks will send a notification to your accountant telling that the “My Awesome Inc.” organization is inviting her to access and manage Quickbooks online.
If you are wondering how the invitation looks like, it looks like this. Just an email with information about you and your organization and the “Accept” invitation button.
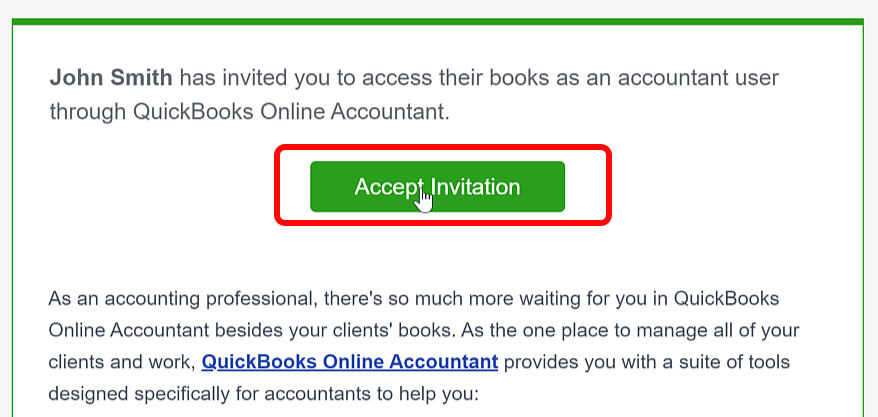
Now it is up to your accountant to Accept it. You can notify her and let her know about the pending invitation.
Once your accountant accepts the invitation, you will notice her invitation’s status changed from “Invited” to “Active.” That means that your accountant now has access to your Quickbooks.
Making accountant Master Admin
In most cases, that is enough, and no other actions are required from you. But it may be a case related to QBO defects or permissions policy when your accountant still can’t access some information or can’t make necessary changes.
If a situation like this happens, your accountant will let you know and ask you to provide her with the “master admin” permissions. Making your accountant “master admin” allow her full access to Quickbooks, but it can be only one “Master Admin” in the Quickbooks, so in that case, you are going to lose your “Master admin” status and became just an “Admin.”
To make your accountant a “Master admin,” click on the arrow under the “Action” column and choose “Make master admin.” The message will appear telling you that you will lose your “Master admin” rights, and your accountant will become a “Master admin.”
Your accountant needs to accept master admin permissions
Now your accountant will receive an email asking if she wants to accept the “Master admin” role and if she chooses “Yes,” she will be asked to log in, and a new role will be assigned to her.
Now, go into your account and refresh the “Manage users” tab. You will see your accountant there with the user’s type “Master admin,” she is now both the user of your Quickbooks and your organization’s accountant. You will see her name under “Accounting firms” as well.
Also, you can not remove her anymore because you do not have such permissions.
How to get “master admin” permissions back
Once your accountant is done with the changes, you can ask for the “master admin” permissions back. In this case, your accountant logs in into Quickbooks and makes the same steps as you did. She will make you a “Master admin,” and once you accept the invitation, login into Quickbooks, and refresh the “manage users” tab, you will see the correct permissions assigned back to you. After these changes, your accountant keeps just the “Admin” permissions.
How to delete your accountant from QuickBooks
In the case you no longer wish to work with your accountant, you want to remove her from Quickbooks to let another accountant take it over. You can do it by pressing the “Delete” action on the “Accounting firm’s” tab for the person you want to remove.
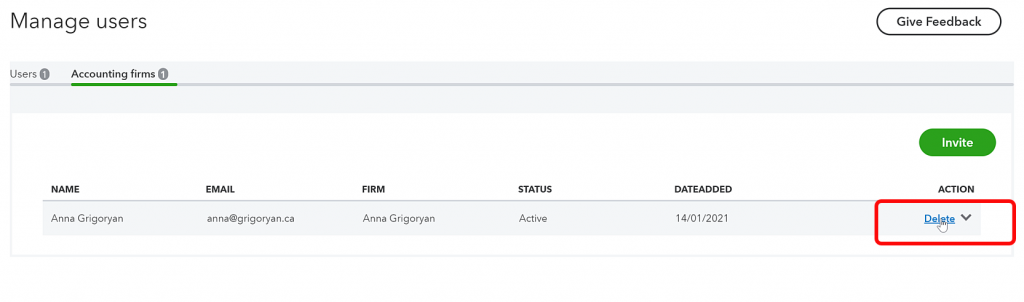
Once you click the “Delete,” button Quickbooks warns you that the accountant will no longer be able to access your organization. If that is what you want, you can accept it and press the “Delete” button to remove your accountant from Quickbooks immediately. Your accountant will receive an email notification that she no longer has access, but the removal action occurs right away.
Visual guide “How to add an accountant to QuickBooks Online”.

Anna Grigoryan is a professional corporate accountant who provides accounting, bookkeeping and tax services to Small Business owners and individuals. She has more than ten years of professional experience in public accounting and a bachelor’s degree in Business Accounting. Anna is the CEO of Taxory, an accounting firm in Toronto area.